Wednesday, August 10, 2011

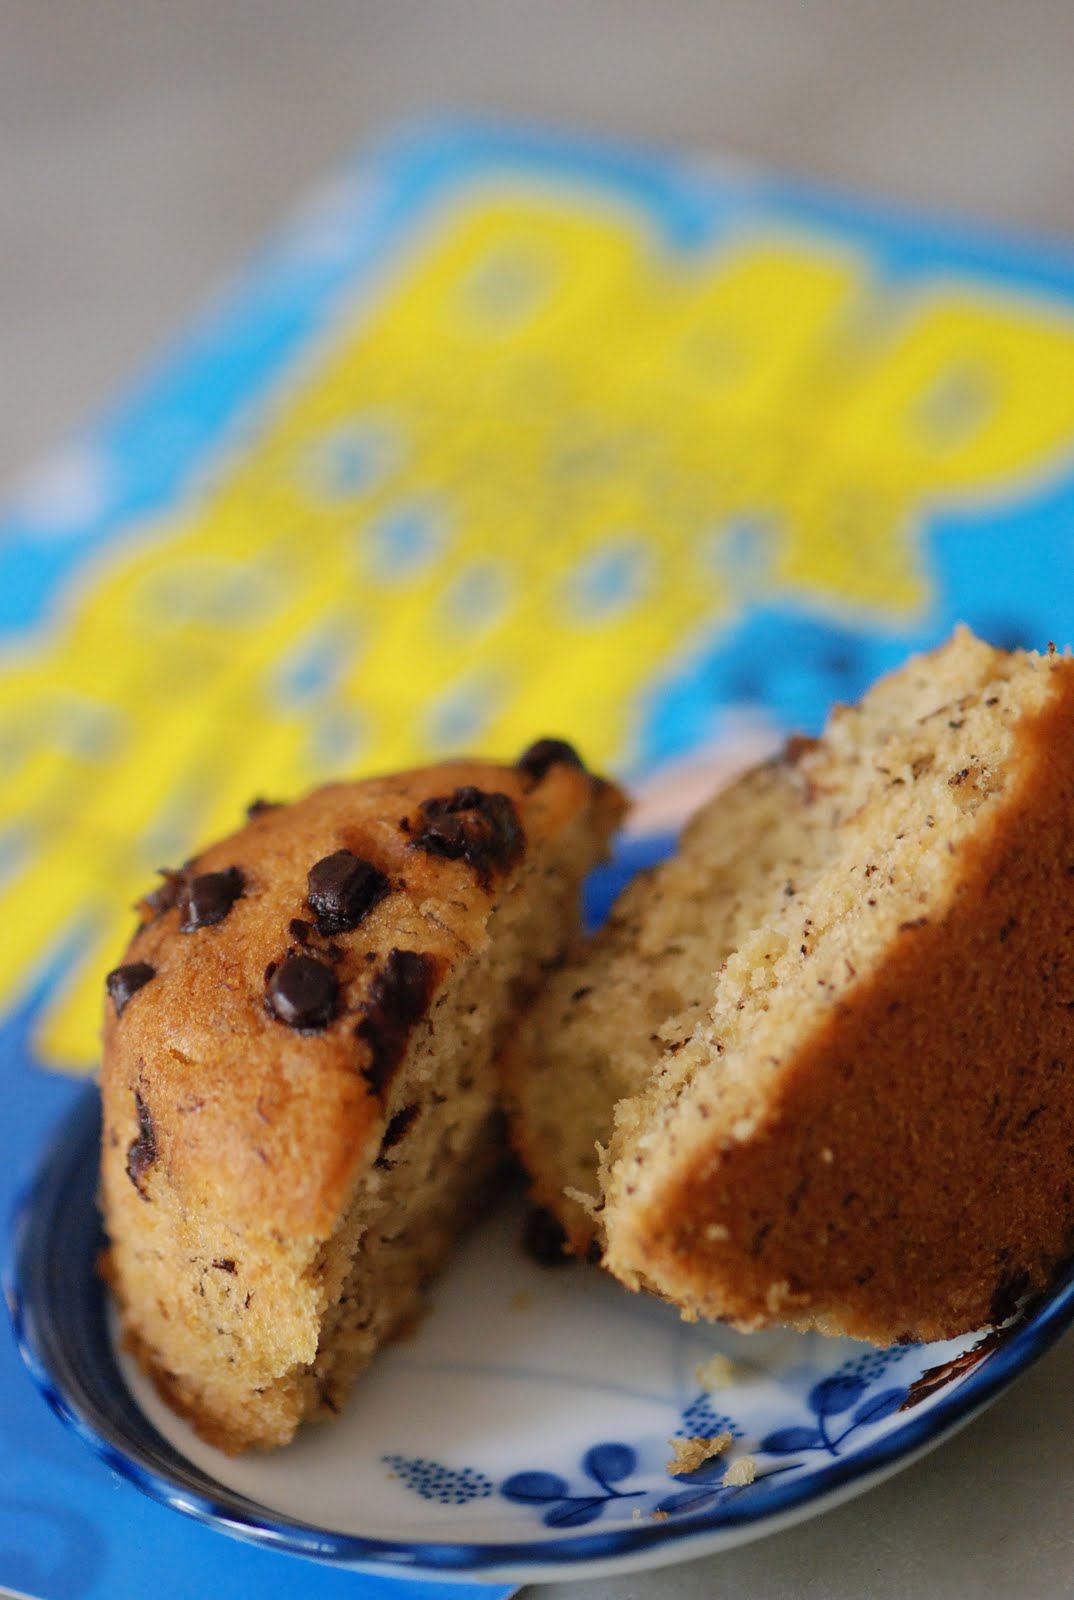
Chocolate Chiffon Cake


Tried my hands on baking a Chocolate Chiffon after attending a recent baking class. So far, I have attempted Orange and Milo Chiffon (recipe for the latter was taken from one of the bloggers). Pretty pleased with this chocolate version as compared to the other two.

The actual recipe calls for a Chocolate Chip Chiffon but clearly from my post, it is a chiffon minus the chips. Well, I had my sister in-law visiting me on that day and at the exact time when I was about to make the cake. She has earned the title of Chiffon Queen. But she has stopped baking for a very long time and I inherited her chiffon cake tins. So I was nervous with her in the kitchen and it showed when I forgot to add sugar to the mixture of flour, egg yolks, oil etc. I did not realize it till I licked at the spatula before washing it (there you go - my confession) and it tasted really bland. Aha! No sugar and I spotted the tiny bag at the corner of the table. I added the sugar and quickly gave it a mix as I was worried I would have over mixed batter. Her presence could still be felt although she left the kitchen for the dining room.


After folding in the egg white mixture (this time I remembered the sugar and cream of tatar), I immediately poured the batter into the tin and popped it into the oven. Very satisfied with the whole delicious brown batter. As I was clearing up the table, there on the table was the packet of weighed chocolate chips. Sigh. But hey, I always wanted to bake a plain, simple chocolate chiffon. The chips could wait.

The Chiffon turned out fluffy and just like what it should be. For a non-expert baker like me, it is an achievement.


I have only sliced pieces for my photo shoot as the whole cake was cut and distributed almost immediately when it cooled. There was no waiting, at least on my part, as I had wanted to try to see if it is really as good as it looks.

Well, I guess I will attempt one more time and this time the chips will be in, folded and baked. 

I am unable to produce the recipe as it was copyrighted by the trainer. However, for those aspiring Chiffon bakers, you could refer to my June 21 2011 post on Milo Chiffon taken from allthatmatters. blog. Her recipes are simply fabulous too.

Wednesday, July 20, 2011

A berry easy cupcake to make


Just thought I should try out this very simple recipe which I spotted on this website -  http://www.goodtoknow.co.uk/recipes/529118/strawberry-cupcakes. It is a rather straightforward way to make very light sponge cakes. No fuss, can be done in a quickie and yet great to have for tea. For the method, I alternated adding the yogurt and the flour. I did that as I overlooked the recipe calling for adding the yogurt, vanilla and egg before folding all the flour. So trust me, it did not produce a disaster.


My initial intent was to bake these to try before deciding to bake three dozens more for a birthday celebration. You see, over at my office we celebrate the birthdays of staff and we gather all born in the same month and throw a cake(s) eating session. My birthday month falls in July and I thought I should 'supply' my own birthday cake. I guess it was the frosting that I was more interested in. I wanted to attempt different colored frosting and types from mascaporne to vanilla buttercream (recipe for the frosting is also given in the website).  However, I ended up making only the mascaporne one and that was all. I did not go any further...


They say the spirit is willing but the flesh is weak. So true in this case as I did not bake for the celebration that week. I could not bring myself to bake. Blame it on the heat.


I might attempt to replace those strawberries with either blue or black berries or even make the cupcakes with all three berries! Bet it will be colorful and well, I hope this time,  my flesh will be willing too.


Tuesday, June 21, 2011

Mi lo Chiffon Cake


I have stopped making macarons - for now. Trying out recipes for brownies and cupcakes have taken up my time these past few weeks. But of late, I had a sudden renewed interest in baking chiffon cakes. I should attribute it to my being at the right time and at the right place to watch a demo through a glass window of a baking school.

I have baked pandan and orange chiffon cakes before and that was like two years ago. The former was more like a sponge cake and the latter, a typical chiffon texture and lightness. Apparently, my family prefers to buy the pandan ones off the shelves at some heartland bakery stores. I reserve my comment and would not want to taste them at all. My own chiffons are not great either.


And so having that urge to bake chiffon, the quest for new flavors kicked in. Blogging brought me to this blogspot - allthatmatters2rei. Check out her site at allthatmatters2rei.blogspot.com/2008/03/milo-chiffon-cake.html


I decided to attempt her Milo chiffon cake after reading her very comprehensive step-by-step approach to making that perfect pandan chiffon. As you can see, my chiffon turned out too low and hence the title of this post is Mi lo chiffon cake - got it??

Definitely not too pleased with the outcome and I shall be posting questions as to why the ideal height was not reached and why the cake was too moist, I think, for a chiffon.

Oh, oh I want to thank Rei for the excellent post.


Monday, June 20, 2011

Father's Day 'Special'


Yes, it is Father's Day (FD) today and I have to just blog about it. As I have mentioned before, blogging allows me to archive my thoughts, inner feelings and my attempts to be a good baker, which otherwise, all will be forgotten in the next months or years to come.

What is so special about FD this year? It seems a long, long time ago that my two boys, Dom and Theo, have expressed their appreciation and love for their dad on a card. When I got up this morning, carefully place on a stool outside my bedroom door was this card. I could not help but smiled and felt a tinkling sensation in my stomach as I read their corny expressions of how great a dad I was. But as to why I felt so touched was because my boys are in their teens! For teens to express their feelings explicitly take great effort. My wife was instrumental to get them to say it all, I reckoned.

And so, with that revelation that aliens-did-not-take my boys away from me, I decided to prepare a Sunday Brunch for the family. Old American breakfast menu of runny scrambled eggs, streaky bacon and bread rolls. No beers for the boys, only the dad gets to drink beer. But this being a baking blogspot, I need to write on something related to it and so I thought.

You may have noticed a cupcake peeking from between the Heineken and card. That was for dessert. Banana Cupcake with Valhorna Chocolate Pearls.


Got the recipe from Sensational Cupcakes, by Alisa Morov. The actual recipe called for dark chocolate ganache to be poured over the cupcakes but I sprinkled them with chocolate pearls instead. Just so as I wanted to whip up something real quick.

Recipe for Banana Cupcakes with Valhorna Chocolate Pearls adapted from Sensational Cupcake:

Ingredients:
1) 240g Plain Flour
2) 170g Caster Sugar
3) 1 tsp baking powder 
4) 1 tsp bicarbonate of soda
5) 1/4 tsp salt
6) 2 eggs
7) 2 ripe bananas
8) 30g thickened cream (I prefer Bulla)
9) 1 tsp vanilla extract
10) 130g unsalted butter cut into cubes (for easy mixing)

Method:
1) Preheat oven to 170 to 180 degrees C.
2) Sift flour, baking powder and bicarbonate of soda at least twice. Put aside.
3) Mesh the 2 bananas and mix it with the thickened cream till smooth. 
4) Add the 2 eggs and vanilla extract to (3) and mix well.
5) Add (4) to (2) carefully and using a handheld mixer, slowly combin them. In actual fact, I put (2)  over (4) and guess what happened when the mixer was turned on? So it is better to add liquid to dry to prevent powder clouds from forming. Common sense? I was not thinking then. Haha.
6) Add the butter and whisk till well combined. The butter should be at room temperature so it will be easier to combine them.
7) Pour batter into cupcake moulds and sprinkle chocolate pearls over the top. The pearls do not sink during baking as I reckon the batter is heavy enough to hold them at the top.
8) Pop them into the oven for 15-20mins and the inserted skewer should come out clean before turning them out of the oven.


The cupcakes are extremely moist - great for breakfast or for brunch. 

Sunday, June 5, 2011

Witches' Brownies


No, I am not into any occult or anything. Titled my post as "Witches' Brownies" because the brownie recipe I am about to share was adapted from a fabulous book, Fat Witch Brownies by Patricia Helding. I had heard of the brownies that come from the lengendary Fat Witch Bakery in New York. I chanced upon the book at the public library and flipping through the colorful and attractive photos, I zoomed into a simple recipe which I thought would produce a high rate of success - Cocoa Brownies.


I decided to bake brownies this time round to break the monotomy of posting my macarons adventure on my blog. In fact, another factor that pushed me to make brownies was my pure guilt of seeing a Nordic Ware Brownie Baking Pan I had purchased sometime ago being stashed away unused in some corner of my pantry. Having attended a class that demonstrated the use of Nordic ware, I was impressed and had wanted to experiment with them. I have tried using aluminium pans with complicated designs for baking before and the fine details do not come out as clean as those from Nordic wares.


As the brownies came out hot from the oven, I could not resist but to remove gingerly a 'triangular' piece from the pan immediately and popped it into my mouth.


Big mistake. I had not let the brownies cool down at all. Common sense did not prevail then. The eagerness to taste what Fat Witch brownies are all about was too great. It is therefore not fair to give my verdict at that point of time. As patience knocked on my head, I decided to leave those brownies alone. A couple of hours later, I tried them and thought them to be a little dry and not too great. It was only the very next day that when I took a piece as dessert that I discovered I had made very moist and chocolaty brownies!

Cocoa Brownies adapted from Fat Witch Brownies
Ingredients:
180g unsalted butter
1/2 cup cocoa powder
11/2 cup brown sugar 
4 eggs
1 tbsp pure vanilla extract, not essence or flavor
3/4 cup plain flour
1/4 tsp sea salt

Preheat oven to 180 degree celsius. Line a baking tin if you are not using Nordic ware. For me, I greased my pan by spraying as little oil as possible.
Heat butter over low heat. Ensure that butter does not boil or worse, turn brown. As soon as I see the butter melting, I remove it from the heat and stir whatever remaining solids to melt them. Allow the melted butter to cool for 5 minutes.
Sift the cocoa powder and mix in the sugar in a separate bowl. Add cocoa-sugar mixture to cooled butter and using a handheld mixer, whisk until blended.
Add eggs one at a time, scraping down mixture that cling to the sides of the bowl after each addition. Beat till batter is smooth.
Add the vanilla extract at this point and give it a quick whisk before adding the sifted flour and salt. I folded in the dry ingredients in 3 batches just to ensure that they are well combined.
Spread batter into tin or pan and bake for 30 to 45 minutes. I suggest you let the brownies cool for more than an hour. Best consumed, in my opinion, the next day.


There are so many other recipes to try out ie from brownies to blondies to bars. I might just want to buy the book and with the prevailing low exchange rate purchase it online.


Saturday, May 21, 2011

Peppermint Macarons


This is the second batch of Peppermint Macarons I made. The first one done last weekend had the right color but there were obvious burnt marks on the shells. It was challenging for me to have light-colored macarons without brown marks that indicated an uneven distribution of heat in my oven. Although I used the fan mode, I noted the hot spots in my oven so I had to turn the tray around while baking before the shells get burnt. I know this is plain common sense but you know what, I try not to touch anything that is in the midst of baking in the oven.

The macarons, under my watchful eyes, came out well - peppermint green. I was careful when I added the coloring (Wiltons Green Verde) so as not to make them too green as in matcha macarons.


I had wanted to add mint candies, crushed finely to bits, and mix them with the almond mixture. However, I did not dare to do anything I was not sure of. The mint bits could blemish the macaron shells.

While surfing the internet, I came across a ganache recipe that is made with peppermint extract and chocolate. It is from http://dessertfirstgirl.com. Good blog to read.


Doing ganache is rather straightforward and as a mint lover, I was tempted to add more peppermint extract but I resisted. I did not want the mint to overpower and subsequently mar the taste of the macarons. As I mentioned earlier, I should have added fine bits of mint candies into the almond mixture during the pre-baking stage. 

In retrospect, whilst doing the filling, I could have experimented and added the crushed mints into the ganache to produce a crunchy and sweeter ganache. Better still, add some of Arnott's Mint Slice into the ganache. These mint slices are available at our neighborhood 711 stores. 

I guess it is also important to use good chocolates like Valhorna's and for the extract, pure peppermint extract by Nielsen Massey. The combination of these great products produced a nice flavored ganache.

Mum loved it and said it was the best compared to the others I had made. Of course, mum, you like all things mint!

As I had made too much of the ganache, I guess I will have to make more peppermint macarons before I venture into doing my next flavor - let me see - Rose Macarons? Oh wait, found a new recipe - Earl Grey Tea Macarons. The Madness never ending.

Sunday, May 15, 2011

Gold Macarons, not Lemon


I attended my third Macaron baking class last Saturday morning. I will be attending another one (hopefully my last with all that hundreds of dollars I have been spending per class) at the end of May. Call me crazy, mad, ridiculous and so on. But I simply enjoy baking and especially baking with others who have the same interest. It is like group therapy for me seeing others absorbed in trying their best to perfect, in this case, their macarons. In fact, my wife is the one who encourages me to, "Go and learn. Never stop learning. Who knows you will pick up a tip or two". "If it makes you happy, go on," and she will end up saying, "It's your money anyway". Apart from that, I think I just want to learn new recipes for macaron fillings. 

I know I can make references to the book I have by Jill Colonna or the millions of recipes for fillings on the internet but somehow, it is different in a class. You become a student all over again. You get to try out the recipe and see for yourself the outcome as it should be or should not be. You know what I mean?

I want to be honest here. When I did the macaron shells as soon as I got home after the class, I had intended to make Lemon ones with Lemon Curd fillings. Since I had made them in class a couple of hours ago, I thought I should try it out at home. Having had a bad experience with the coloring (as pointed out in my previous blog), I wanted to make sure I had bright and cheery and lemonnish yellow macarons. I used the icing gel labelled Buttercream yellow. Mistake! Again! What turned out were Coppertoned Macarons. Darn! Hey, wait! Got an idea. Creative outburst in the midst of defeat.


As part of a 'rescue' operation, I dusted the resting shells with gold powder - as you can see in the photo above. Did not bother whipping up the lemon curd anymore but came up with a Baileys cream filling instead. Thought it more suitable here. From Lemon Macarons, I am now presenting Gold Macarons with Baileys Cream fillings. I really cannot remember where I got the recipe from. Must be from the net but did not copy the URL. Give me time to search for the owner of this recipe before I post the amount required each of the ingredients. At this juncture, I suppose I can share the steps I took to make the fillings as they are the universal steps to make cream fillings. On hand, have

-a tub of mascarpone
-whipping cream
-sugar
-Coffee liquer - which I obviously used Bailey but I am sure Kahlua or Tia Maria will do just as great

On a stand mixer, I whipped up the mascarpone till light. Added sugar and beat again. Poured in 1/2 cup of Baileys (always like a strong taste) and whipped it up again. Found it too liquid. Perhaps I should have added in more mascarpone. 

In a separate bowl, I whisked the cream till stiff. Folded the Baileys mixture into the whipped cream. Piped them out immediately on my waiting shells.


They say that after piping the fillings, keep the macarons refrigerated and allow the fillings to infuse into the shells. Point noted but not taken. I immediately popped one into my mouth. Delicious.  I took another and decided to bite off a little and let the remaining portion pose for a photo shoot. 

As I arranged the macarons and positioned the Baileys bottle outdoors, the mid afternoon humidity began to bother me and my poor macarons began to become more shiny and soft by the minute. Not sure if this happens to other macaron makers as well. Anyway, I must say I was quite pleased with how my Lemon, I mean, my Gold Macarons with Baileys Cream fillings turned out...